Territorial Just Transition Plan
PURPOSE
This document describes the specifications related to the Territorial Just Transition Plan (TJTP). The TJTP needs to be defined by the MS in case JTF is covered in their IJG Programme(s). The TJTP can be defined and then used by different Programmes. A TJTP version will never be sent as such to the Commission. It will only be sent as part of specific Programme version(s), when it is referred by the specific Programme version, and assessed together with that Programme version.
REGULATIONS
More detail regarding the regulation of the Territorial Just Transition Plan (TJTP) can be found in the "About SFC2021" section of the portal.
ROLES
Roles involved in Territorial Just Transition Plan (TJTP) are:
MS Managing Authority (MSMA)
| Record the TJTP Upload the TJTP Documents Consult the TJTP Delete the TJTP Validate the TJTP Create New Version of the TJTP Reopen the TJTP Mark TJTP as completed |
MS Audit Authority (MSAA) | Consult the TJTP |
FUNDS
JTF |
Workflow
This section shows the lifecycle to create and manage a TJTP. There is no modifying the TJTP once it has been submitted. The Commission cannot change a TJTP, only respond.
Click here to see the TJTP workflow diagram in high resolution.

Create the TJTP
Remark | The User is an identified User and has the role of MS Managing Authority with Update rights (MSMAu) for JTF. |
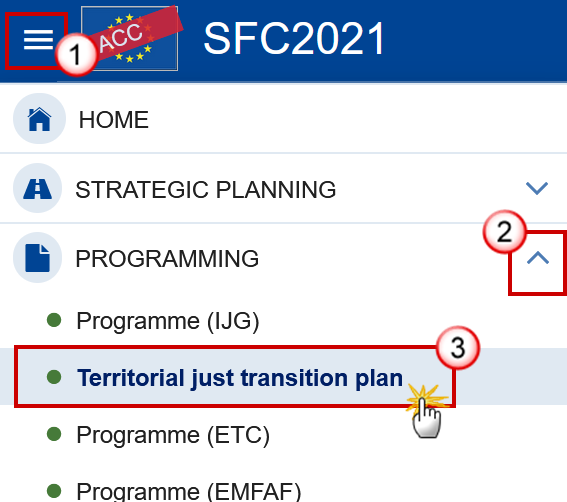
To access the TJTP go to the Programming menu and select the Territorial Just Transition Plan menu item:
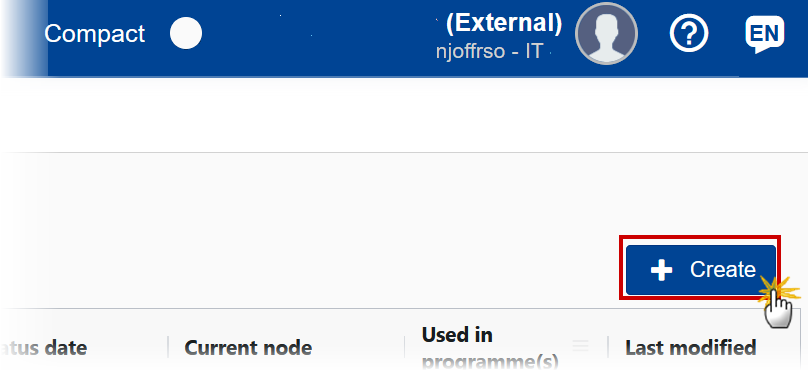
Click on the Create button to create a new TJTP:
You are redirected to the TJTP Creation Wizard:
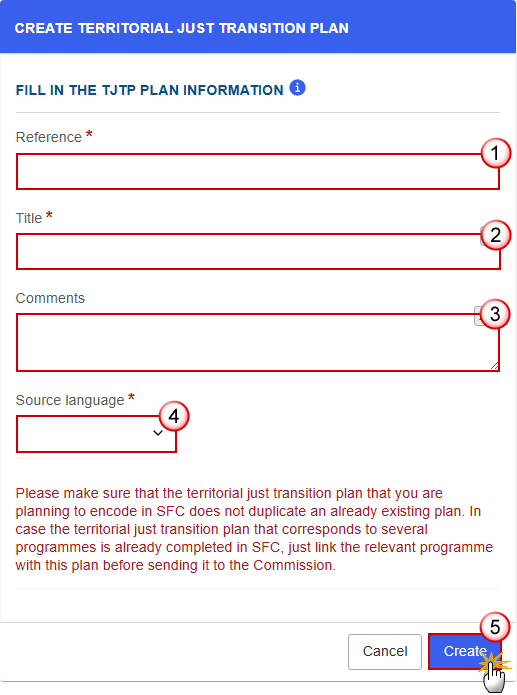
Enter or select the following information:
(1) Enter the Reference.
The Reference must be unique within the Country and can only be updated when Version 1.
(2) Enter the Title.
(3) Enter any Comments.
(4) Select the Source language.
(5) Click on Create to confirm creation of the the TJTP.
The status of the TJTP is Open.
Remark | The initial TJTP structure is created, and a Table of Content (ToC)/Navigation Tree is presented, so the User can enter the structured data of the TJTP. |
Record/Edit the TJTP
General
Version Information
Note | The Version Information contains information on the identification and status of the TJTP; like the Reference, Title, Version Number, Status, Current Node, etc. |
Click on the Edit button to access the edit form to modify the information:

The Edit form appears:
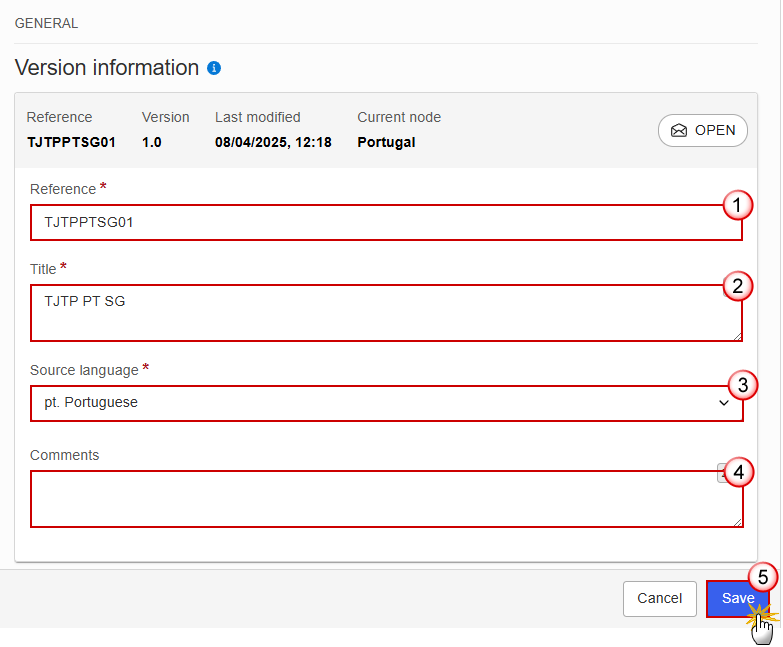
Enter or select the following information:
(1) Enter the Reference.
The Reference can only be updated when Version 1.
(2) Enter the Title.
(3) Select the Source language.
When the Source language is changed on save, an alert will ask confirmation of the User because of the impact on the already automatically translated text of the object version. The alert message will say “The source language is used to automatically translate all text in the object version into English. Changing the source language should only be done when it doesn’t reflect the language used in the different text fields for this object version. It will regenerate all the text translations for the object version.”
(4) Enter any additional Comments.
(5) Click on Save to save the information.
The Programme versions referring to this TJTP table will contain any IJG Programmes that have linked this TJTP in the corresponding section of their Programme.
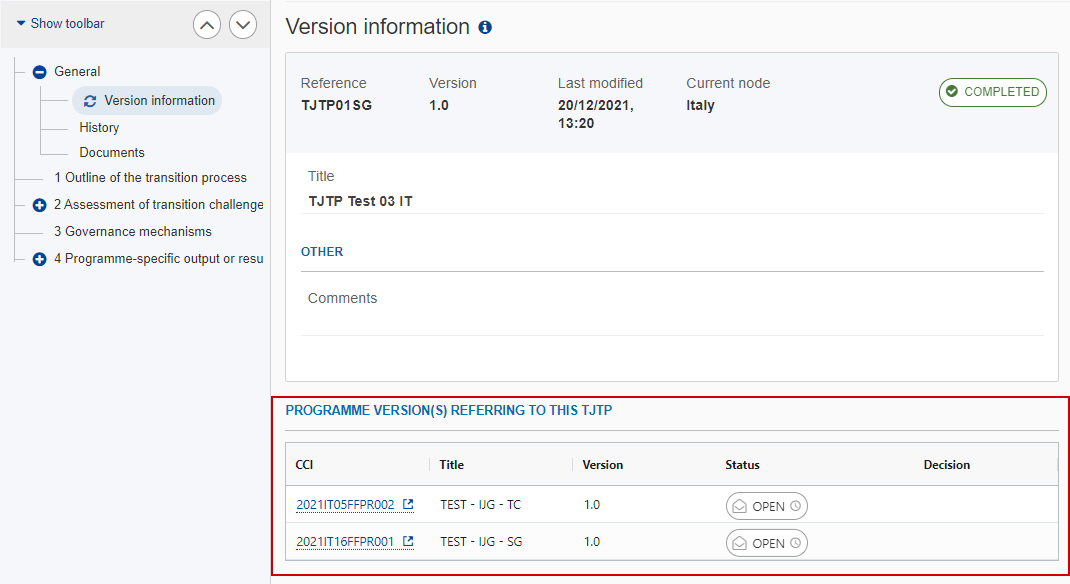
Click on the Refresh icon
 in the Version information menu to refresh the list of linked Programmes.
History
This section shows all the actions that have been taken on the TJTP since it was created, for example:

Documents
Note | The Documents list shows all documents uploaded against this version of the TJTP by Member State and by Commission Users. These documents will never be sent from within the TJTP module. When the TJTP version is referred by an IJG Programme version, then a copy of these documents is sent with the Programme version. Additional information that can not fit into the designated free text boxes of the TJTP template can be added by attaching the document type ‘TJTP Supplementary Information’. |
The following documents will be foreseen:
Description | Internal Code | Non-Integral (1) | Integral (2) | System (3) | Required (4) |
TJTP Supplementary Information | TJTP.TJTPS | X |
|
|
|
(1) Document can be sent at any time
(2) Document will be automatically sent when the Object is sent
(3) Document automatically created by the system
(4) Document required in the system before a next action can be executed
Remark | As the TJTP.TJTPS document will never be sent, it is normally not visible for Commission Users. An exception will be implemented to allow Commission Users to consult documents of this type. |
Uploading & Sending Documents
Clicking on the Add button
 will open a pop-up window allowing you to add a new document type with attachments.
Selecting a document row and clicking on the View icon
 will allow you to view the document information.
Selecting a document row and clicking on the Edit icon
 will allow you to modify the document information. If a document of type 'Other Member State Document' must be sent, you can select the edit icon in order to send the document.
Selecting a document row and clicking on the Delete icon
 will allow you to delete the document and all attachements.
Click on the Add button to add a new document:
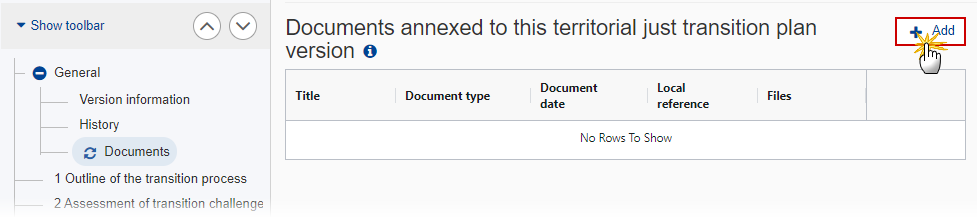
The Edit document detail pop-up window appears:
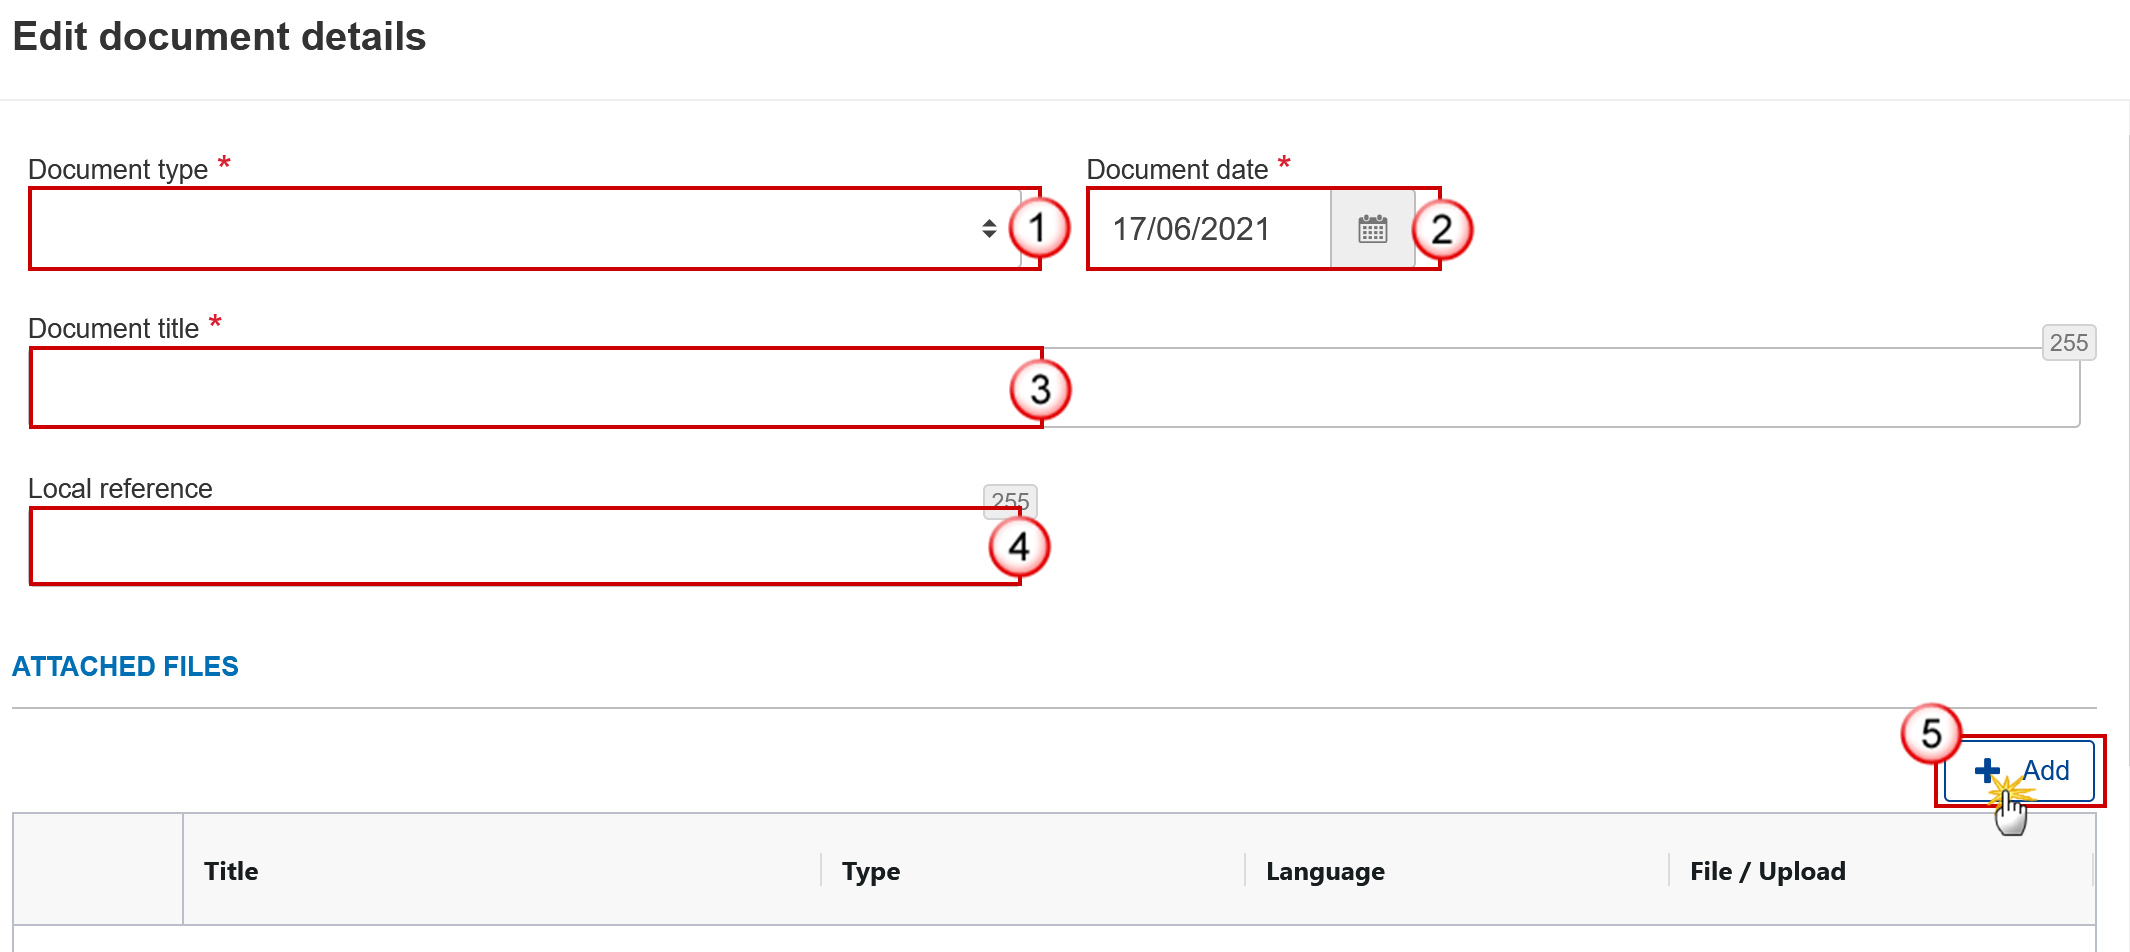
Enter or select the following information:
(1) Select a Document type.
(2) Enter a Document date.
The system automatically fills the field with todays date, but this can be modified.
(3) Enter a Document title for your Document.
(4) Enter a Local reference.
(5) Click on the Add button to add a new attachment:
You can add multiple attachments by clicking on the Add button.
You can remove unwanted attachments by selecting the attachment and clicking on the Remove button.
The Attached files window becomes editable:
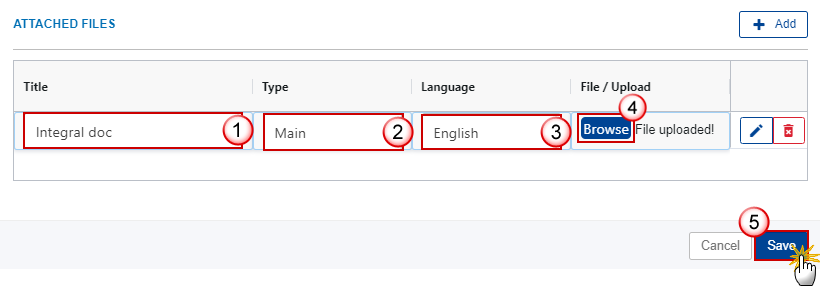
Enter or select the following information:
(1) Enter a Title for your attachment.
(2) Select the Type of the document.
It is possible to select from these 4 types: Annex, Cover Letter, Main or Translation.
(3) Select the Language of the document.
(4) Click on Browse to select the file that you want to add as an attachment.
(5) After the attachments are uploaded click on Save.
Remark | The documents in the TJTP will only display the Save button and will never be sent, but will be visible to Commission Users. |
Deletion of an unsent document
Remark | Only unsent documents can be deleted. |
In the row of a previously uploaded unsent document click on the Delete icon to delete the document and associated attachments:
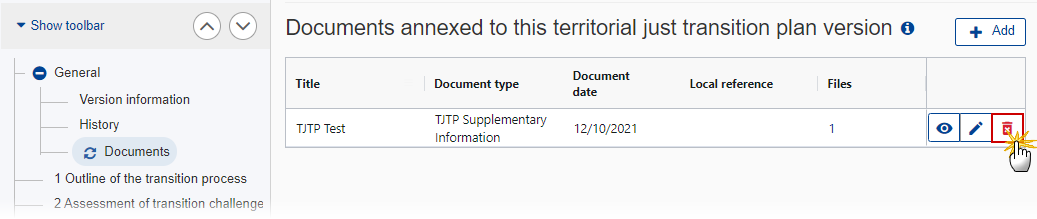
A confirmation window appears:
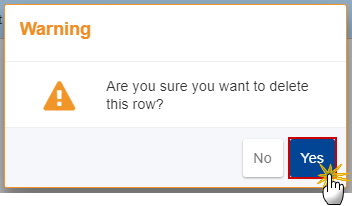
Click on Yes to confirm deletion. Click on No to return to the document section.
1 Outline of the transition process
Click on the Edit button to enter the information:

The Edit details window appears:
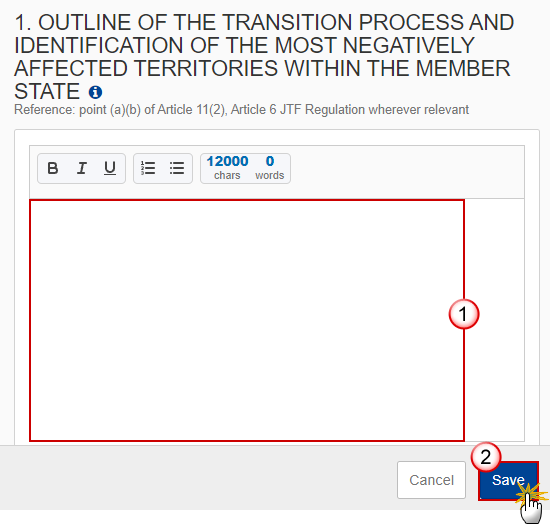
Enter the following:
(1) Enter the text in the text box provided.
(2) Click on Save to save the information.
2 Assessment of transition challenges
Click on the Add button to add information in the table:
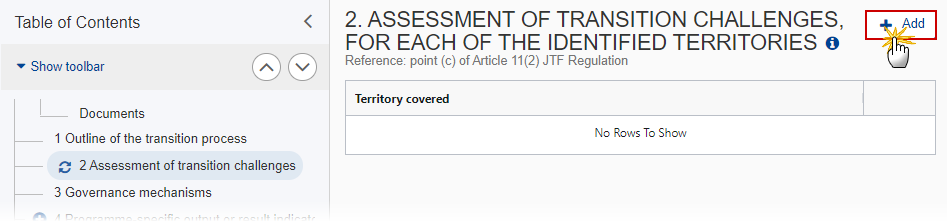
The add row window appears:
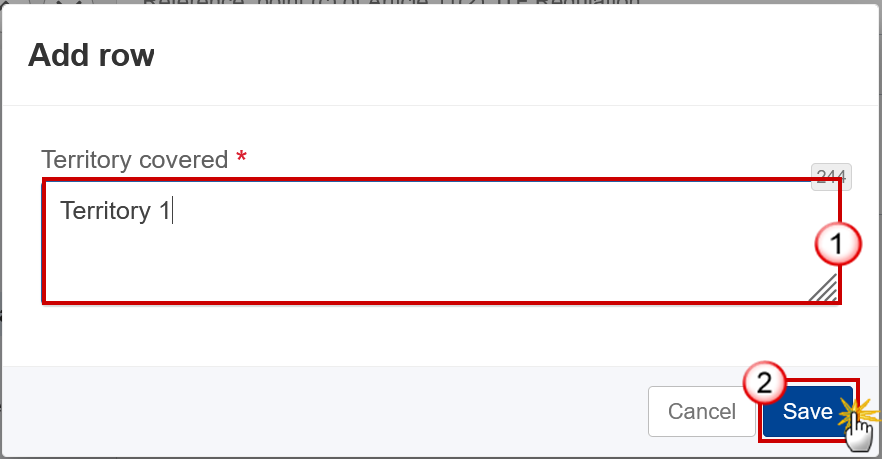
Enter the following:
(1) Enter the Territory covered.
(2) Click on Save to save the information
Remark | For each Territory created/deleted a Table of Content entry and sub-entries will be created/deleted. |
Territory
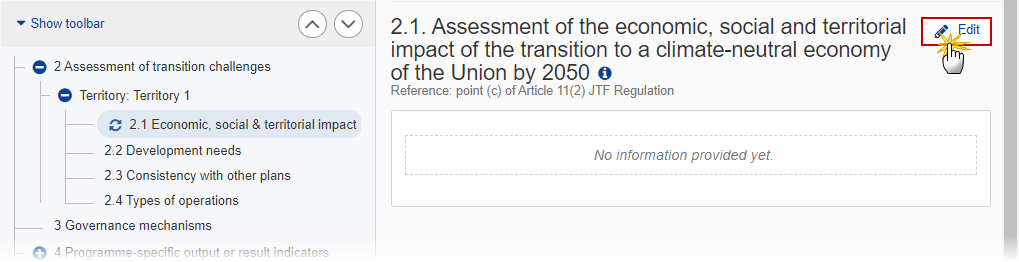
2.1 Economic, social & territorial impact
Click on the Edit button to enter the information:
The Edit details window appears:

Enter the following:
(1) Enter the text in the text box provided.
(2) Click on Save to save the information.
2.2 Development needs
Click on the Edit button to enter the information:

The Edit details window appears:
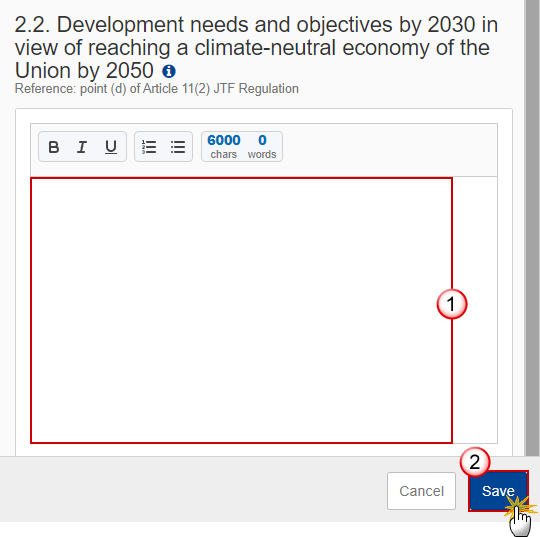
Enter the following:
(1) Enter the text in the text box provided.
(2) Click on Save to save the information.
2.3 Consistency with other plans
Click on the Edit button to enter the information:

The Edit details window appears:

Enter the following:
(1) Enter the text in the text box provided.
(2) Click on Save to save the information.
2.4 Types of operations
Click on the Edit button to enter the information:

The Edit details window appears:
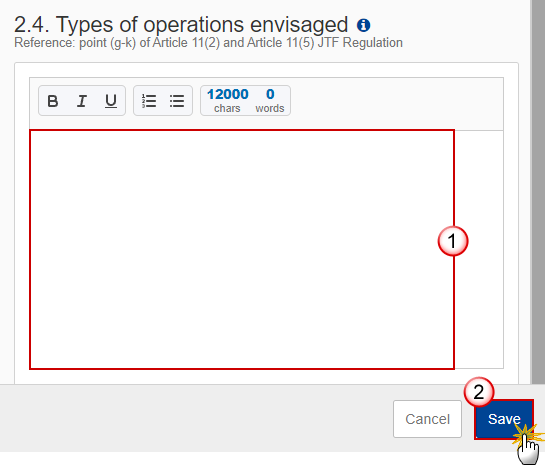
Enter the following:
(1) Enter the text in the text box provided.
(2) Click on Save to save the information.
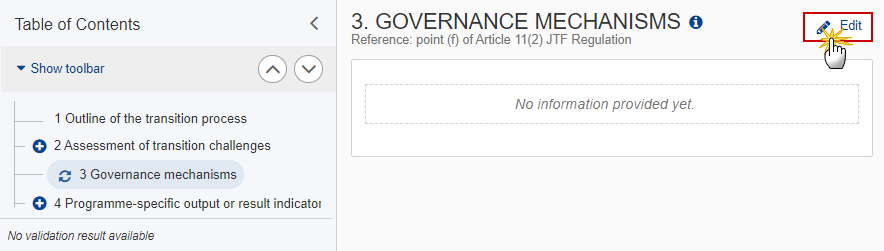
3 Governance mechanisms
Click on the Edit button to enter the information:
The Edit details window appears:
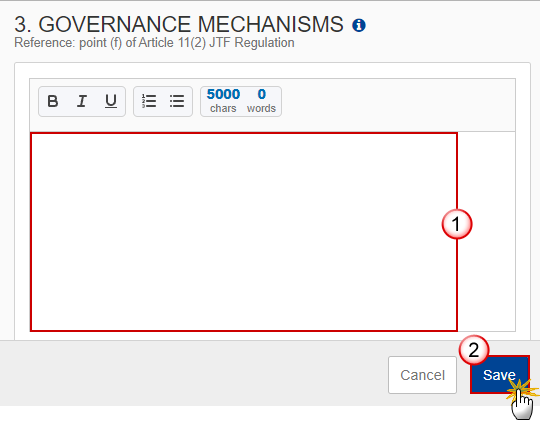
Enter the following:
(1) Enter the text in the text box provided.
(2) Click on Save to save the information.
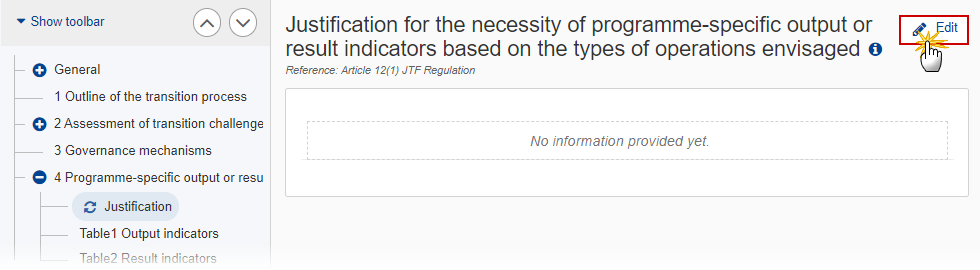
4 Programme-specific output or result indicators
Justification
Click on the Edit button to enter the information:
The Edit details window appears:
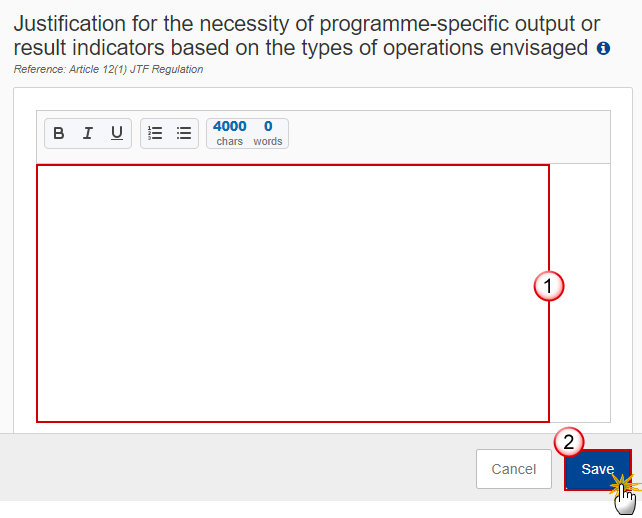
Enter the following:
(1) Enter the text in the text box provided.
(2) Click on Save to save the information.
Table 1 Output indicators
Clicking on the Add button
will open a pop-up window allowing you to add a new Output indicator.Selecting an Output indicator row and clicking on the Edit icon
will allow you to modify the Output indicator information.Selecting an Output indicator row and clicking on the Delete icon
will allow you to delete the Output indicator.
Click on the Add button to add a new output indicator:

The edit details form appears:

Enter or select the following:
(1) Enter the ID.
The Indicator ID must be different from the Common and Reserved Indicators for IJG.
(2) Enter the Indicator name.
(3) Enter theMeasurement unit.
(4) Enter the Milestone (2024).
(5) Enter the Target (2029).
(6) Click on Save to save the information.
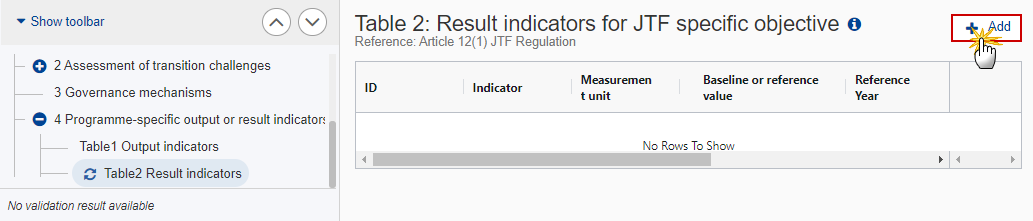
Table 2 Result indicators
Clicking on the Add button
will open a pop-up window allowing you to add a new Result indicator.Selecting a Result indicator row and clicking on the Edit icon
will allow you to modify the Result indicator information.Selecting a Result indicator row and clicking on the Delete icon
will allow you to delete the Result indicator.
Click on the Add button to add a new result indicator:
The edit details form appears:
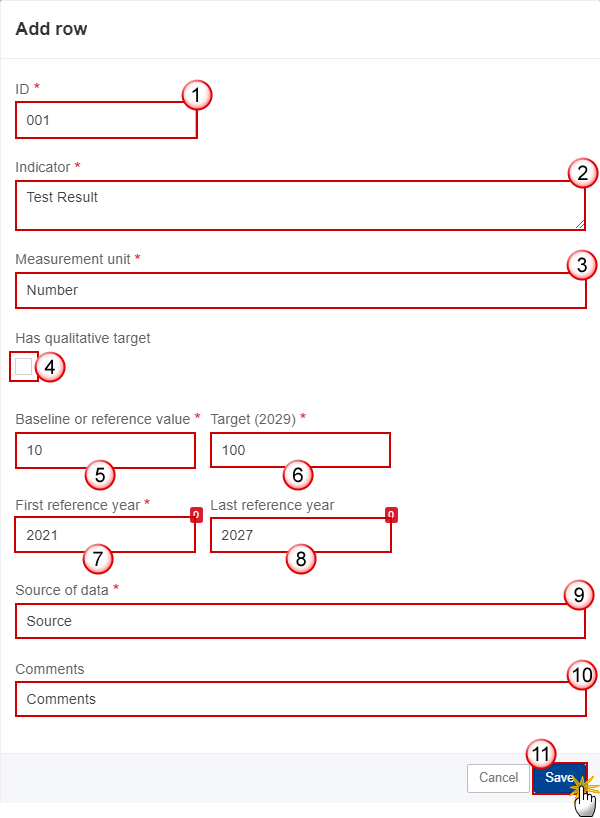
Enter or select the following:
(1) Enter the ID.
The Indicator ID must be different from the Common and Reserved Indicators for IJG.
(2) Enter the Indicator name.
(3) Enter the Measurement unit.
(4) Check the box if the indicator Has qualitative target.
When the Indicator has a qualitative target, a Field for the Baseline value and the Target value will be foreseen and stored as "qualitativeBaseline" and "qualitativeTarget", otherwise a Number field will be foreseen and stored as "baselineValue" and "targetValue".
(5) Enter the Baseline or reference value.
(6) Enter the Target (2029).
(7) Enter the First reference year.
(8) Enter the Last reference year (not mandatory).
(9) Enter the Source of data.
(10) Enter any Comments (not mandatory).
(11) Click on Save to save the information.
Validate the TJTP
Remark | The TJTP can be validated when the current version is in status Open. To validate the TJTP, the User must have the role of Member State Managing Authority with Update access (MSMAu) for JTF. |
Click on the Validate button to validate the TJTP:

Remark | An Error will block you from sending the TJTP. The error(s) should be resolved and the TJTP must be revalidated. Note that a Warning does not block you from sending the TJTP. |
The system validates the following information:
Code | Severity | Validation Rules |
001 | Error | Validate that section 1 is not empty. |
002 | Error | Validate that section 2.1 is not empty. |
003 | Error | Validate that section 2.2 is not empty. |
004 | Error | Validate that section 2.3 is not empty. |
005 | Error | Validate that section 2.4 is not empty. |
006 | Error | Validate that section 3 is not empty. |
007 | Error | Validate that the ID of the programme specific output indicators is different from any of the common and reserved indicators for IJG (implicit in web). |
008 | Error | Validate that the ID of the programme specific result indicators is different from any of the common and reserved indicators for IJG (implicit in web). |
009 | Error | Validate that there is at least one territory covered in section 2. |
010 | Warning | Validate that the territories covered under section 2 are not covered by other existing territorial just transition plans. |
011 | Error | Validate when at least one programme specific indicator is defined in table 1 or 2, that a justification is provided. |
012 | Error | Validate that there is no justification provided when no programme specific indicator is defined in table 1 or 2. |
An example of a validation window:

You can check the list of validation results at any time throughout the TJTP:
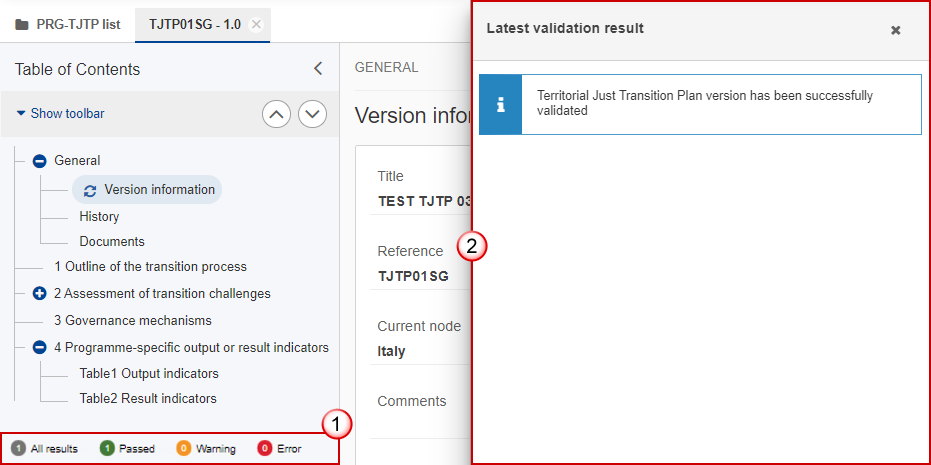
To see the last validation results:
(1) Click on one of the 4 categories: All results, Passed, Warning, Error.
(2) The list of latest validation results for the chosen category is displayed.
After all errors have been resolved the status of the TJTP becomes Validated.
Mark the TJTP as completed
Remark | The TJTP can only be marked as complete once the Validation Errors have been removed and the status is Validated. Only completed Territorial Just Transition Plan versions can be referenced by Programme Versions covering JTF. The notification utility will be called to notify officials in charge of last Programme versions referring to the Territorial Just Transition Plan, that a newer version of the TJTP was completed. Once a new version of the TJTP has been completed, the Programme should refer to that latest version of the TJTP. To mark the TJTP as completed, the User must have the role of Member State Managing Authority with Send access (MSMAs) for JTF. |
Click on the Mark as completed button to mark the TJTP as completed:
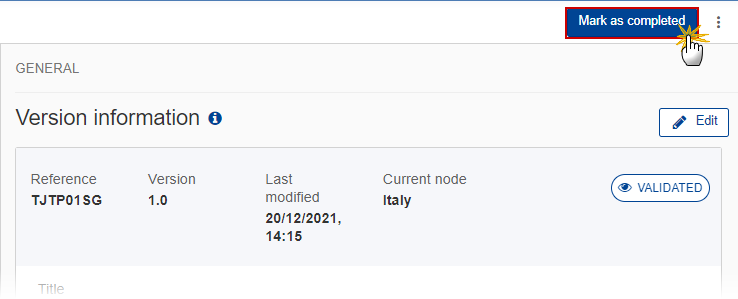
The system will ask you to confirm the action:
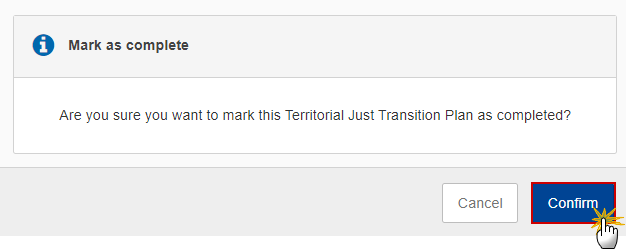
Click on Confirm to confirm.
The status of the TJTP is set to Completed.
Delete the TJTP
Remark | The TJTP can only be deleted when the status is Open Or Validated and resides on the owner node. To delete the TJTP, the User must have the role of Member State Managing Authority with Update access (MSMAu) for JTF. The delete is a physical delete and cannot be recovered! |
Click on the Delete button to remove the TJTP from the system:
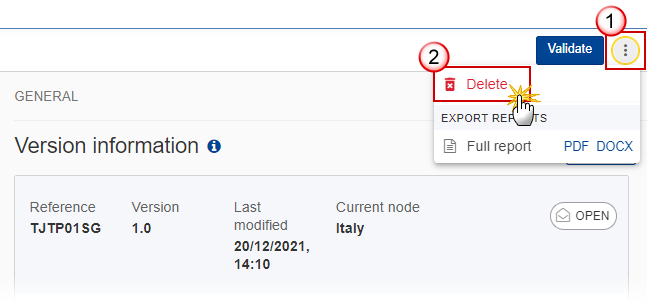
Select the following:
(1) Select the icon with 3 vertical dots.
(2) Click on the Delete button to remove the TJTP from the system.
The system will ask you to confirm the delete action:
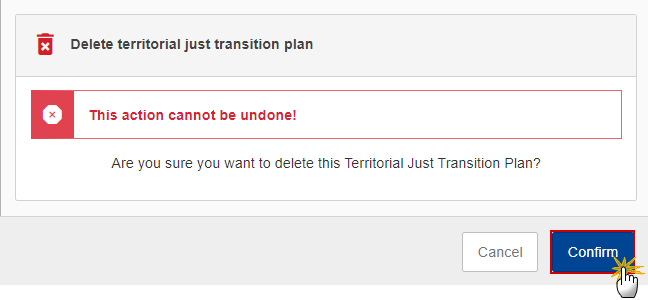
Click on Confirm to confirm or click on Cancel to return to the TJTP.
Create a New Version of the TJTP
Remark | A new version needs to be created when the User needs to apply modifications and the last version is already completed. The last version of the TJTP is in status Completed. To create a new version, the User must have the role of Member State Managing Authority with Update access (MSMAu) for JTF. |
Enter the current version of the TJTP in status Completed and click on the Create button to create a new version of the TJTP:

The system will ask you to confirm the creation of a new version:
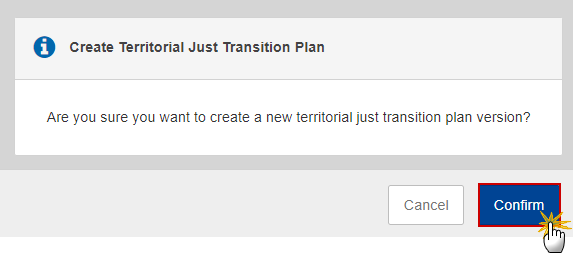
Click on Confirm to confirm. Click on Cancel to return to the TJTP.
A new version of the TJTP has been created as a copy of the last version. Its status is set to Open and the version number is incremented by one.
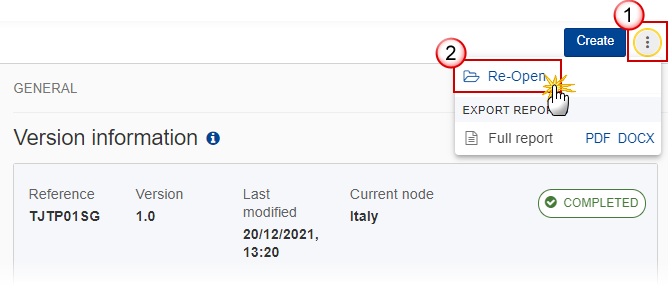
Reopen the TJTP
Remark | The Member State User can reopen a completed Territorial Just Transition Plan to apply some modifications. The TJTP version is in a status Completed, has no Programme versions referring to it and no more recent TJTP versions exist. To reopen the TJTP, the User must have the role of Member State Managing Authority with Update access (MSMAu) for JTF. |
Click on the Reopen button to reopen the TJTP:
The system will ask you to confirm the reopen action:

Click on Yes to confirm. Click on No to return to the TJTP.
The TJTP has been reopened and its status is set to Open.